Friday, February 27, 2015

WRADSkype #2: Sign up for World Read Aloud Day 2014 (on 4th March) with Nal’ibali and Gcina Mhlophe

image

Read aloud with Nal'ibali and Gcina Mhlophe
I was very excited to read about the upcoming World Read Aloud Day. This post appeared on the Nalibali site. Every year, World Read Aloud Day draws everyone’s attention to just how important reading aloud and sharing stories with children is. People all over the world spend time on this day celebrating the power of stories and building communities of readers.

This year World Read Aloud Day is being celebrated on 4 March 2015. Join us on this day and read a story especially written for us by South Africa’s best known storyteller, Gcina Mhlophe to children you know. Last year Nal’ibali called on South Africa to help set a read-aloud record and together we read aloud to nearly 50,000 children! This year we’d like even more of you to join us and read to children on this special day – and, of course, then continue reading aloud to them throughout the year.

How to join in:
On 4 March 2015, read our World Read Aloud Day story to:
  • your own children, grandchildren, nieces and nephews
  • children in your class or at your school
  • groups of children at your reading club, library, educare centre or community centre.
Download one of our World Read Aloud Day story kits below with the story, fun activities and a special World Read Aloud Badge for children to colour in – or read it online here.
You can read it online here on our website, OR on our mobisite here . You can also listen to Gcina Mhlophe reading the story in English, isiXhosa and isiZulu.

Signing up I would like to sign up one of the classes I teach on Wednesday 4th March. Perhaps the class that I have suggested for the World Read Aloud Day Skype would like to read this book as well. 

I love Google #5

I love finding out more about how to use Google in the classroom. After looking through all the Google posts that were shared to my various subscriptions this week, these were the ten that caught my eye. 

1. Best Practices for Using Google Classroom - gCON for GAFE
http://goo.gl/BVNvzN
This is an hour long video. Join Juan De Luca, Google Certified Teacher and Trainer, and learn how take advantage of Google Classroom in your school. This simple, but powerful, tool can help organize your classroom workflow and improve the productivity of teachers and students. The session will include best practices, tips and tricks on setting up and managing Classroom.


2. 20 collaborative Google Apps activities for schools
http://goo.gl/jpey23
Ditch that textbook has a great list of collaborative activity ideas (also available as a PDF here). The way that Google Apps is interactive and easy to share is powerful. Students can share ideas in real time with other students around the world, an option that never existed before.

image
3. How to Disable Chrome's New User Menu
http://goo.gl/c5rUz2
There's an update rolling out for Chrome right now that adds a new menu to the top-right of the app that lets you manage users.I can’t say that I like it – it takes up too much time - and I was glad to read about this way of disabling it. Here's how to disable it.

image

4. How to use Hangouts in the Classroom
http://goo.gl/OjDOhj
Teachers can start using Hangouts simply by setting up a Google+ page and signing up for the Hangout feature. They can conduct virtual classrooms at a number of places; it allows a teacher to teach up to 10 classrooms at the same time. It makes classes interactive and students can ask questions whenever they want. They can use it to connect their classroom with other classrooms or to connect their students with experts across the world, providing them with connected learning experiences. There are many ways in which teachers and students can derive benefits from using Hangouts in the classroom. This posts names a few.

image

5. ‘Introduction to redesigned Admin Console’ from Google for Work
http://goo.gl/BWAFfA


The Admin Console has a new look. The redesign comes as part of a Google-wide move to updated interface design standards intended to make products easier to navigate and use. This video highlights a few things that have changed.

6. What IS Google Classroom?
http://goo.gl/1GC8Ae
If you've been wondering what Google Classroom is (or is NOT), this video from moi is for you! Should you get ready for implementation? Can you replace your current system with Classroom? This video will help you answer those burning questions. Then, join the discussion below this post on Google+ to share how your school is using Classroom to improve instruction. Also, don’t forget to install the free Synergyse training for Classroom by visiting https://www.synergyse.com/ and clicking the large green Install button!


7. The Apps Show Shortcuts: Email Aliases
http://goo.gl/cJjYd1
Keeping your inbox safe has never been easier! In this Shortcut, Charles shows you how to quickly create an email alias so you easily filter unwanted messages.

8. A Guide to Google Apps for the iPad
http://goo.gl/mLGRiZ
The infographic embedded in the post above details the most useful Google apps for the iPad in the opinion of Kasey Bell.
image

9. Get your FREE Google Classroom iPad App User Guides!
http://goo.gl/Yk6zhF
Get your FREE user guide for the new Google ClassroomiPad App!
Google just released an Android& iOS app for Google Classroom. It's not full featured (yet) so it's important that teachers and students understand exactly what you can and can't do with the app. There are two user guides – one for students and one for teachers.

image

10. A Curated List of the Best Youtube Channels for Educators
http://goo.gl/IaYdtk
Michael Fricano’s PLN has helped curate this great list of educational Youtube Channels! Click to access the Google Doc directly. Create a comment or suggestion to add your favorite channels!

image

Thursday, February 26, 2015

My Takeaways from the first South African iPad Summit on 16th and 17th February 2015

ipad1.JPG

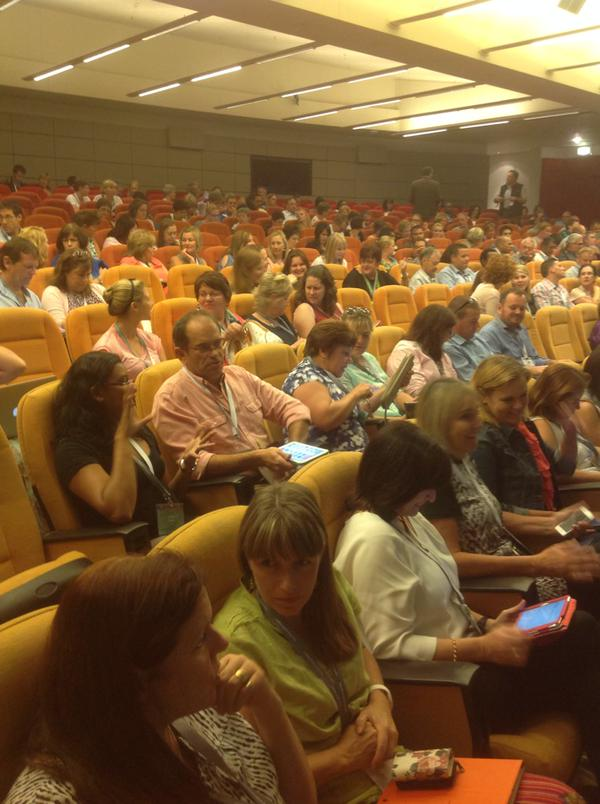
On Monday the 16th of February 400 excited delegates gathered at The Forum in Bryanston, Johannesburg for the South African iPad Summit. These iPad summits are held all over the world, so it was an honour to be able to attend the first one in Africa. The aim of the summit was to share ideas on the benefits of the tablet in the classroom as a tool for learning, sharing and improving creativity.

This event was hosted by Think Ahead (Michelle Lissoos) and Apple’s 
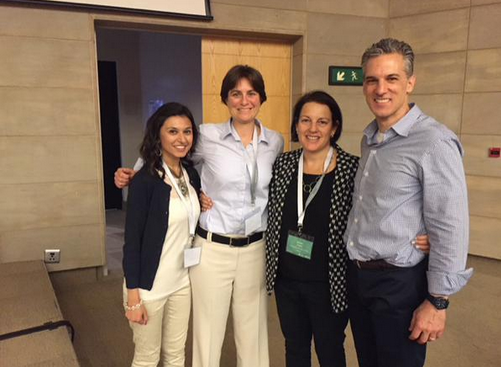
Core group,  and it featured the EdTechTeacher team from the USA comprising Tom Daccord, Beth Holland and Sabba Quidwai. Tom and Beth are two teachers I follow on social media regularly. I didn’t know Sabba, but she quickly joined the ranks of my firm favourites! In this post I’ll give an overview of the conference outlining my ten takeaways and in future posts I’ll outline what I learned in more depth.


image

Apps we downloaded before the time
In the week before the summit we were invited to download and join an app called Bizzabo and start networking using this app. (We were also invited to download the Uba app for directions, and the Gautrain app.) Bizzabo was, indeed, a great app to work with.  What you had to do was download the app,  search for the event namely The South African Ipad Summit,  sign up using Linkedin or your e-mail address,  and then network and send messages to the people you recognised among the delegates. We could also see exactly what the program was for the week. Apart from that the program was clearly set out with three choices for each time slot - All, Beginners/Intermediate and Advanced.
 
image

The programme showed exactly which apps to download for each session.   (see: http://edtechteacher.co.za/wp-content/uploads/2015/02/Education-iPad-Summit-App-Guide.pdf)

School visits after the conference
One could book to go on school visits for the two days after the conference.  I didn’t avail of this but it must have been a great sequel to the Conference.


The session options during the conference
Day 1
  1. Keynote: iPads in the classroom from conception to creation (Tom)
  2. Creating Learning Centres with iPads (Beth).
  3. Digital storytelling with iPads (Tom)
  4. The advanced iPad classroom (Sabba)
  5. Understanding the flipped classroom: concept and strategies (Tom)
  6. Differentiating with iPads to reach all learners (Beth).
  7. Course creation with iTunesU (Sabba)
Day 2
  1. Keynote: Empowering students to share their learning with iPads (Beth)
  2. Deepening technology integration (Tom)
  3. An introduction to iTunesU (Sabba)
  4. Extending the physical with the digital (Beth)
  5. Assessment for learning (Tom)
  6. Reading and writing with iPads (Beth)
  7. App smashing and app fluency (Sabba)
  8. Closing session
My ten takeaways from the Conference

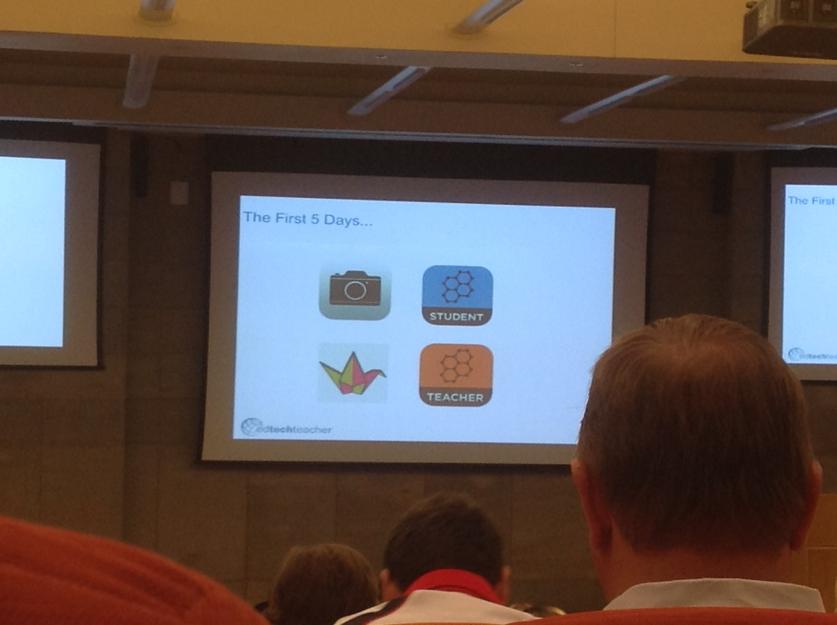
1. Keynote: iPads in the classroom: From Consumption to Creation (Tom Daccord)

image
In this excellent presentation Tom outlined different ways for students to use the iPad in in order to produce creations. He gave brilliant ideas for the first day in class,  the first five days of class and the first five weeks of class etc. In fact he gave many useful examples of getting students to create on the iPad in meaningful ways with the teacher providing the necessary scaffolding for the tasks. Many useful apps were referred to and recommended.  Tom stressed that one should look for ‘ Evergreen Apps’  which are apps that can be used in any subject during the learning process, suitable for any learning style. An "evergreen app" allows a child to use a variety of skills/content/knowledge in one app.  We need to empower students through creativity -  technology must be in service of learners to do this. Our task is to unleash creativity and innovation in all learners in multiple modalities and put every student in a position to create content in order to show mastery of the content!

View image on Twitter

Educators shouldn't think of iPads as repositories of apps but rather as portable media creation devices. Never start with what can the iPad do - that limits creativity. Rather think ‘This is what I'd like to do’. It's not what you can teach with iPads but it's about what student can do with iPads.  It is not about the technology – it’s about technology in the service of education!


2. Digital storytelling on the iPad (Tom Daccord)


image


image In this extrememly inspiring session Tom outlined some of his very successful digital storytelling projects including identity narratives, oral histories, social issue documentaries, language activities, maths and science demonstrations and presentations of art and music. We were introduced to popular iPad digital storytelling apps and best use strategies.  The challenge is for students to put together a compelling story with a message. I loved this session with its wealth of great ideas. 

3. Course creation with iTunes U (Sabba Quidwai )


image iTunesU is a unique way to customize content and create learning experiences that incorporate a variety of learning materials. If you create an iTunesU course for your class you can include video, audio, images, books and articles to read. Students can also participate in discussions. One can make announcements to the students who can in turn manage their assignments and tick them off when done. Sabba took us through this process step by step.

4. Creating Learning Centres with the iPad (Beth Holland)


image

image Ipads are a fantastic device for creating learning centres in a classroom. By taking this approach students learn to communicate and collaborate through guided small group activities. The presentation drew extensively from Kristen Wideen’s Grade 2 /3 blog and showed how she uses Fluency Centres, Maths Centres, Writing Centres, Observation Stations etc. extensively. I loved seeing and hearing all the practical ideas from this session.
5. Keynote: Empowering students to tell the story of their learning (Beth Holland)

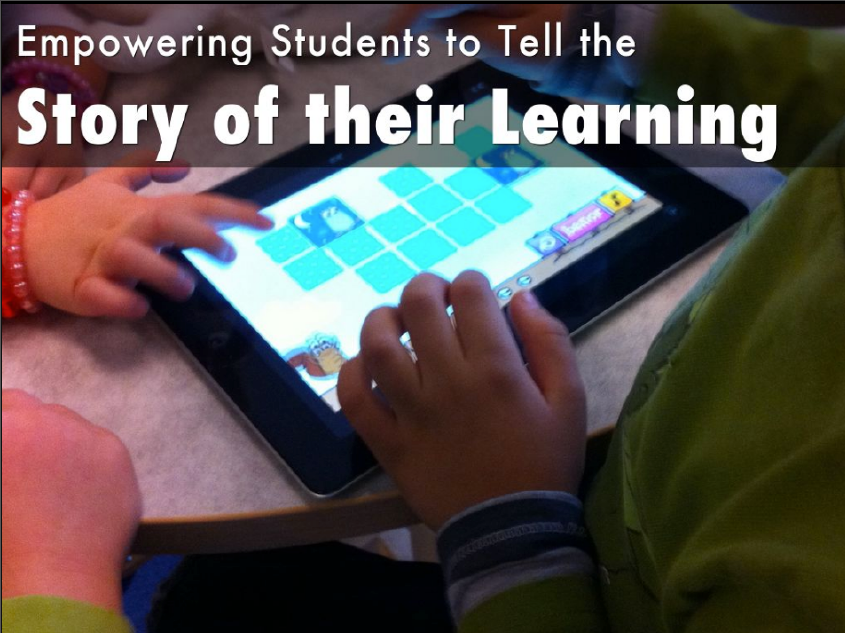
This was a great keynote from Beth Holland. The suggestion was that we remove the technical limitations to what is possible for students to create and by so doing we empower students to tell the story of their learning. We provide them with options and choices for delivering their creations and in so doing we enable their growth. I loved the emphasis on the importance of the process in learning and encouraging students to make their thinking visible.

6. Deepening technology integration (Tom Daccord)
image

This was an amazing, interactive session dealing with Dr Ruben Puentedura’s SAMR model of Substitution-Augmentation-Modification-Redefinition. We saw how this model allows the creation of a dynamic and innovative learning environment. We analysed iPad-integrated activities and worked through the process from enhancement to transformation. The goal with this model is to create technology-rich environments that support student acquisition of higher order thinking skills.

image
image

7. Apps smashing and app fluency (Sabba Quidwai)
The App-smashing 101 presentation on Tuesday was extremely inspiring, teaching us how to use apps in a very creative way, by way of app-smashing (combining) the apps. The important thing about apps is not to have too many of them, and to make sure the ones that you do have can push and pull to the camera roll.

IMG_3027

image

I loved this session – I learned so much! We went through a number of different, possible app combinations.

IMG_2846

We were given a task to create a video app smash and then we held a TeachMeet type report back which was very enjoyable (and inspiring). The most popular apps used in this instance were Tellagami and Book Creator.  

IMG_3056

8. The benefits of using Aurasma in the Classroom (Lulu Burger)
Lulu from Think Ahead gave a brilliant presentation on all the different ways one can use Aurasma, the Augmented Reality app,  in the classroom. She went through the whole process step-by-step. Use of this app can really help make lessons come alive.

image

9. Other highlights
I loved the way we were shown, at the end of each day, some South African video stories of iPads being used in disadvantaged schools around the country.

During the course of the conference we were encouraged to tweet about our AHA moments for a prize at the end of the conference. We could also post these moments on stickies on the provided flipcharts in the foyer.

IMG_3088

Examples:
“Vision Vision Vision AHA moment”

“AHA! The creative product is the culmination of traditional knowledge and understanding of the content."

“AHA moment at #iPadedsummitZA - You don't need to search for all the "best" subject apps. It is about learners creating content!”

“Its about engagement. It's not about content.”

“AHA moment: use #explaineverything app to assess reading comprehension. Excellent idea.”

"It's not about throwing out what we have it's about evolving what we do really well"

10.  The EdtechTeacher team readily shared their resources
The team shared their presentations through a Dropbox link and we also had access to a number of tutorials explaining various apps.
https://storify.com/EdTechTeacher21/weekly-resources-from-president-s-day-wee. We could download two books from http://www.askmsq.com/#!ipad-summit-south-africa/c1hd2

Do Ink Screen: A quick tutorial how to use Do Ink Green Screen to create a moving Newspaper Video http://goo.gl/YjPa1d
Touchcast: http://www.thinglink.com/scene/551087208086372352

This was a very worthwhile conference to attend. At the end of the conference the announcement was well-received that this excellent conference was to become a yearly event!

Conclusion
Before attending this conference I wondered whether tablets really can be seen as creation devices in a classroom. Surely one could do so much more with a laptop! However I have changed my mind completely. I left the conference with a strong belief that we need to encourage creativity and visible thinking in a classroom so that our students engage in 21st century, higher-order thinking skills and that the tablet is probably the best device for this.   The careful use of the right apps can allow for engagement, differentiation and exciting creative expression options in a classroom.

A summary of the tweets from the conference can be found at this Storify link: http://goo.gl/r93ZUZ

Friday, February 20, 2015

WRADSkype #1: I have signed up for World Read Aloud Day Skypathon 2015

I signed up for this World Read Aloud Day Skypathon on March 4th either with Grade 2, Grade 5 or Grade 6. Let's see what happens. Here is the gist of the post:


About this Skype lesson

We are looking for K-5 classes around the world to join us on March 4 for a World Read Aloud Day Skypathon.

When you sign up you will be paired with a partner class in another location. You and your partners will schedule a Skype call for March 4th with each other. Classes will take turns reading their favorite picture books to their partners. Afterwards you are free to ask questions of each other and get to know a bit about your new friends. The Twitter hashtag for this lesson will be #WRADSkype. Feel free to connect with others and share pictures about this Skypathon on Twitter.

We would like classes from all over the world will join us to grow cultural awareness and understanding as well as our reading skills. As an extension, we are hoping that many of the participating classes will be motivated to create their own stories and share them with the rest of us using the #WRADSkype hashtag on Twitter.

Our hope is to use this project to motivate students to read, write, and create their own stories to share with others for years to come. Please check the link below to sign up. We would love to have you join us as we celebrate the power of literacy by grabbing a book and reading aloud. If you would like more information and help in contacting classes let us know. We would love to help you start your own skypathon.

Registration will be open for this lesson until Friday, February 20th. You will be notified of your partner class’s information by Friday, February 27th. Once you receive that information, you can plan your Skype call for World Read Aloud Day on March 4th.

I love Google #4

After looking through all the Google posts that were shared to my various subscriptions this week, these were the ten that caught my eye. 

1. Top ten Google Apps security tips from the Ed Tech team
http://goo.gl/dcVc1O
This is a PDF put out by the EdTechTeam showing questions and answers about security issues in visual form.

image


2. Newspaper maps powered by Google maps Newspaper Map powered by+Google Maps http://goo.gl/pTWpR

image


3. Today I received the nicest Valentine’s Card ever, from one of my classes.
http://mmeduckworth.blogspot.ca/2015/02/today-i-received-nicest-valentines-card.html
Amazing what you can do with Google Forms and how attractive you can make them look. This post is by Sylvia Duckworth.

image


4. Save Kahoot Quiz Results In Your Google Drive Account  http://goo.gl/bVP5qW
Kahoot is featured at the end of nearly every Best of the Web presentation that Richard Byrne gives. Kahoot provides a fun way to gather feedback from a group through their phones, iPads, Chromebooks, or any other device that has a web browser and an Internet connection. You can include pictures and or videos as part of each question that you create and share in a Kahoot activity.

image


5. 'Essential guide to getting started with using Google Apps.' http://goo.gl/yAYBqm
This is a lovely infographic created by Alice Keeler in Google Drawing 'Essential guide to getting started with using Google Apps.'  She made this using Google Drawing.


6.  Save your YouTube Videos to Google Drivehttp://www.labnol.org/internet/save-youtube-videos-to-google-drive/28793/
The important point is how do you get your original video files from YouTube for uploading to other websites? There’s an option available inside Google Takeout that will not only let you download your YouTube videos in their original high-resolution but also saves the files directly to your Google Drive. Thus, you can start the download process and it will save all your files, big and small, to Google Drive in the background. Once the files are in Drive, they’ll automatically sync to your desktop that you can later upload to other video websites.

7. Getting Googley with Infographics http://goo.gl/6jccLM
This is a great post about creating infographics using Google Drawing – it also gives step by step instruction

image


8. Cool Google Tools for Teachers
http://goo.gl/OA25B

Steve Anderson says that “We all know Google will do searches, mail, calendars, images and tons more stuff, but I got really excited when I came across a list on Twitter with all the Google Tools and Apps, listed A-Z. There are so many great resources for educators and students. Steve provides a slideshow presentation of his favourite cool tools in this post.

image

9. Google A-Z 
http://goo.gl/SBz9n

This is a great Google Doc listing all the Googletools from A-Z. This is worth bookmarking.

image


10. How Google Docs' research tool removes drudgery from reports and presentations
If you use Google’s free office suite, there’s an easy way to access everything you need for your report—a built in research tool that lets you search for the information you need and easily add it to the Google Doc or Google Slide you’re working on without having to leave the page. Here’s how to get started.

image

Tuesday, February 17, 2015

Thinking of creating a Google site? Some excellent tutorials


Thinking of creating a simple website without any knowledge of HTML? Google Sites is a free and easy way to create and share webpages. Basically, you would follow this sequence:

Log into your Google account and go to http://sites.google.com
  1. Click the Create button
  2. Choose the Blank Template
  3. Name your site. You'll notice it creates the URL based on the name but you can change that if you wish. The name you choose must be unique in your domain.
  4. Select the Themes section, and choose a theme (i.e. iceberg)
  5. Choose the More Options section, and write a short description of your Site.
  6. Type the captcha code (if you get one)
  7. Click the Create button at the top of the pageIt is as simple as that!
I came across some great tutorials on creating a Google site by Mike Raveneck and thought I would share them here.

1. Creating a Google Site - Sites Tutorial 1 of 5


In the first tutorial of this 5 part series, Mike shows how to create a Google Site.
  • He shows how to log in to Google, then to Google sites and choose ‘Çreate sites’.
  • You can choose a template which can be changed later. You could end up with a site that looks like this one:
image

2. Basic Editing Features of Google Sites - Sites Tutorial 2 of 5


This tutorial reviews some of the basic editing features of Google Sites, including inserting and formatting options. To get to your newly created site, log in to Google and type in Google sites and navigate to the site you have created. 
  • Mike shows the essential editing features which are common to most word processing documents.
  • He explains Insert, Format, Table and Layout
  • He shows how to insert a YouTube video
  • He demonstrates inserting a Google document. This will be a live document that incorporates any changes made in the document in Google Drive.
  • He demonstrates uploading an image and inserting a Google map
  • He demonstrates inserting a horizontal line, Google +
3. Page & Site Settings of Google Sites - Sites Tutorial 3 of 5


This tutorial illustrates a number of the page and site settings for modifying pages within a Google Site. This is the third tutorial in a five part series on using Google Sites.
  • Click on More in the right hand corner.
  • Mike looks at page settings and demonstrates the various options of website, file cabinet, list or announcement.
  • He discusses page templates and site actions
  • He talks about changing the navigation bar to a horizontal navigation bar; and aslo about managing the site.
  • Mike discusses the Google Help section also available under the More button.

4. Adding a New Page to Your Google Site - Sites Tutorial 4 of 5


This tutorial reviews some how to add new pages and subpages within a Google Site.
  • Click on the new page button on the top right.
  • Create your pages first. Afterwards add them to your navigation bar.
  • Mike also discusses how you go  about nesting pages under the horizontal navigation bar.  Once can change to a sidebar if required,
5. 'Managing' Your Google Site - Sites Tutorial 5 of 5


This tutorial reviews how to manage a Google Site using the features within the 'Manage Site' area of the Site. It is the final video in a five part tutorial series on using Google Sites.
  • There is only 100MB of storage available in a Google site
  • Under the Manage sites hyperlink under ‘More’ you can create a copy of the site.
  • You can change the theme of your site under manage site – change theme.
  • Further problems can be ironed out by looking through the Site Help section under More.

Friday, February 13, 2015

I love Google #3

After looking through all the Google posts that were shared to my various subscriptions this week, these were the ten that caught my eye. Why not try them out? 
1. Soon Offline Access Will Be the Default Setting for Google Docs and Slides
http://goo.gl/1Wj2tX
This is great news for schools where Internet access is intermittent. Over the next couple of weeks offline access will become the default setting for folks who sign into Chrome on the web and visit Drive, Docs, Sheets, or Slides.Bear in mind that you have to sign into Chrome.
2. My Favourite Chrome Extensions - Week of February 2nd
http://goo.gl/aiN5bL
These are four Chrome extensions that one can use with Gmail. Could be worth trying these out.
image
3. 10 Google Slides activities to add awesome to classes
http://goo.gl/UI6XVF
I always like reading posts from Ditch that Textbook. Google Slides lets students collaborate and display ideas effectively. Create animation, story books, video galleries and more. Actually, there are vast possibilities with Google slides.
image

4. Google Earth Pro is now free
http://goo.gl/1ZAIVN
Google Earth Pro has been available for free to teachers with GAFE email accounts for quite a while. Now it is available for free to anyone who wants to upgrade to Google Earth Pro.
                                                         

5. How to Enable Offline Use of the Latest Version of Google Drive 
http://goo.gl/3b5MTd
Using Google Drive offline will soon become default it is said. Currently you have to enable using Google Drive offline. Note that:
  1. Drive will only work offline in a Chrome browser window.
  2. You can use Drive offline on multiple computers, but you need to enable it on each computer individually.
  3. If you share computers with another person, you may not want to sync to that computer as it could give both people access to the files.
  4. If you are using Google Drive within a Google Apps for Education domain, your domain administrator will have to enable the option for users to use Google Drive offline.
image
6. Chalk up – a wonderful Google Drive Tool for teachers
http://goo.gl/ZtNreM
Chalkup has finally made the move to Google Drive and created a seamless integration of Chalkup with Google Drive. Chalkup is a great web tool that allows teachers to create classes and share different study materials on a message board that students can access in real-time. Chalkup lets you post discussion prompts, add comments to discussions, distribute announcements and assignments and view files.

image

7. Excellent Google Drive Resources for Teachers http://goo.gl/GOFEgS
This is a list of excellent resources to help teachers make the best of Google Drive in their classrooms. The thing with so many of Google's services is that their power and usefulness lies in their hidden features. The resources in this post cover some of these features.

image

8. Google Classroom Setup 
http://goo.gl/VK4VAx
This video gives a run down on setting up Google Classroom.


9. Five things every teacher should be able to do on YouTube
http://goo.gl/UZ6b6C
Here is what you will get to learn from these tips:
  • Know how to add subtitles and closed captions to your videos
  • Add and edit annotations
  • use enhancement features to improve your videos
  • How to use YouTube video editor to combine, trim, add music and customize your clips
  • How to search YouTube library for copyright-free music to add to your videos
  • How to swap the audio track on our videos
image

10. Pixlr- A Great Google Drive Tool for Editing Pictures
http://goo.gl/LtXa7V
Pixlr Editor is a great photo editing tool that you can use to work on the pictures and images you want to use with your students or in your presentations. Pixlr is easy and simple to use and works right from your web browser. It is also integrated with Google Drive.

image