Showing posts with label Microsoft. Show all posts

Friday, July 23, 2021

Story writing #1: Using 'Design Ideas' in PowerPoint to create attractive story backgrounds with Grade 5


I am starting a series of story-writing posts today. This is the first one of three. 

One of the teachers at my school wanted help in publishing stories digitally rather than having the students write them in their books. So we worked together in creating lovely stories in PowerPoint. Powerpoint is a perfect application for publishing stories. In this post I want to suggest a way for a student to use the Bing browser and PowerPoint to create a background for an illustrated, digital story - a background that will vary from slide to slide, but keep to the original theme. 

Write stories that can be published

One of the things that I love doing in my classes is getting the students to write stories and publish them in different ways. I've always been of the opinion that it's such a pity to write a story at school and then let it just 'disappear into nothingness' in an exercise book. Why not get it published digitally, and share it with the world! My classes all have blogs, so they are able to publish the finished products on their blogs.

Use PowerPoint for writing stories

Microsoft PowerPoint is a great tool for writing stories.  Our students use mainly Chromebooks so we used the online Office and PowerPoint which they sign into with their Microsoft accounts. (Our school is in the throws of getting Office 365 for the learners – I can’t wait!).

Create backgrounds using 'Design Ideas' in PowerPoint

The wonderful thing about using PowerPoint is that it has a feature called Design Ideas. So every time you insert an image into a slide, Design Ideas comes into play down the right side and gives all sorts of suggestions for placing the image on the slide. Consequently you can use one background image in a variety of ways. Here is an example: 


How to create varied backgrounds

My class was writing a story about ‘Three wishes’ so, after the story had been planned, they needed to prepare a presentation in PowerPoint and create suitable backgrounds for the story on their slides.  

This is how to go about it:

1.  In PowerPoint create a presentation with around 5 – 8 blank slides.

2. Go to Insert/ Pictures/ Online pictures

3. This automatically opens the Bing Browser which you can set to only include Creative Commons images which are free to use. Type in, for example, ‘Clipart nature scene’.

4. Choose one and select Insert

You'll notice that 'Design Ideas' immediately goes into play and suggests ideas. Choose from these ideas. 


Examples of backgrounds 

Here are a few examples of backgrounds my class created using 'Design Ideas'. Take a look through. They created around 8+ different backgrounds, in the same theme,  with each image.  


Next steps


Once their presentations had been created, with varied backgrounds, the class added their stories and then set about adding illustrations. That process is for another blog post! But in the meantime - here is a link to the finished stories which i have captured in a Wakelet: https://wke.lt/w/s/epv3qS

Wednesday, March 13, 2019

Present class projects as e-books using Microsoft PowerPoint


The task

Every term I set one of my classes a task of creating a eBook project in one of their subjects in line with the class curriculum and presenting the project as an online eBook using PowerPoint. This is because I want all of them to have practice in creating eBooks because eBooks are a great way to present online information. eBooks can be viewed online via a link. They can also be displayed on blogs either by embedding the PowerPoint or by creating a link to it. Here are the steps for this project. 


Step 1: Choose your topic

You could create a project on any topic you like. In my case I chose a Grade 7 life skills curriculum project the students had to research and write a summary of one of the following diseases: which they would then present to the rest of the class full stop The diseases are: tuberculosis, pneumonia, malaria, measles, Hepatitis B, Influenza, Yellow Fever, Diphtheria, Small Pox or Black Death. I usually try to get two students working on one topic so that they can get together for brainstorms and planning but still come up with their own individual project.

Step 2: Create the content for the eBook
Give the students a rubric to guide them. This could include the type of pages/slides that they should use in their projects. In our case the pages/slides were as follows
1. Title page
2. Table of contents
3. Definition of the word disease.
4. A general overview of the disease they have chosen
5. The incidence of the disease, including a map
6. Causes of the disease
7. Signs and symptoms of the disease
8. Diagnosis
9. Treatment options
10. Strategies for living with the disease
11. Prevention of the disease
12. Additional interesting information
13. Bibliography

In each section the students need to find information, videos and images that are free to use; and create links to articles to back up their findings. They could collect the information via Microsoft Word before selecting from it for their final PowerPoint eBook. Here is the link to the rubric http://bit.ly/2OLBUGE 

Step 3: Create a PowerPoint template for the contents
We used PowerPoint for several reasons.
You can add video and sound to the final product via Office Mix.
You can embed the Power`poiYou can save the final product as a PDF.nt in a blog or website.
It is easy to manipulate images within the PowerPoint, and overlay images and text.
Each slide can also contain a section or page of information in the final eBook to add to the book feel of the final presentation.
The slides can be linked together for ease of use.

This is how you create the template:
Open PowerPoint and choose your layout. Decide how you would like the eBook to look.
Go to the Design Menu, Click on ‘Slide Size’ on the right and make your choices. We selected the portrait slide orientation and changed the slide size to Custom 7.5 X 10 inch (my computer works in inches!). This part is optional to the size you would like to choose.\
Point and choose your layout. Decide how you would like the eBook to look. We wanted the project to look like an eBook.


Here is a link to a presentation showing how to set

Step 4: Add the cover image
In this section we learn about Creative Commons images and Public Domain images versus ‘any’ images. The best way to add an image is to save it on your computer and then use the snipping tool to get the portrait orientation. Insert the cover image by clicking on the ‘Picture’ option in the ‘Insert’ menu, and select the cover image where you saved it on your computer.


The learners then overlay the cover image with their names and the title of the e-book. This feature is one of the plus points for using PowerPoint for making eBooks.

Here is an example of a cover page:


Step 5: Insert page numbers (slide numbers)

Start the numbering system now. Go to Insert/Slide numbers and make your choices as shown below. Select Slide number, Footer, Don’t show on the slide and Apply to All


Step 6: Create a Table of Contents page
This allows the reader to go anywhere in the presentation. Once you have created all your slides you will link each heading in the Table of Contents to a slide heading.

Step 7: Create the eBook
The learners use the content they have recorded in Microsoft Word to create the content for their PowerPoint. They ensure that the font and font sizes are uniform throughout the eBook.

Step 8: Insert your bibliography as you go along

I like the learners to draw a line at the bottom of each slide so that they can put links to the pages where they found their information even though the information has been synthesised into their own words. They also create the Bibliography for the last slide with the relevant links.


We didn’t learn a particular format for citing a bibliography in this project – that will come later. I simply asked them to give an explanation and a link. In the next project we will write the Bibliography in the format below as found in A Sample Elementary Bibliography Style Sheet found at http://bit.ly/2gOJxPe

                                  
This is how we did the Bibliography for this project. It appeared on the last slide.


Step 9: Link the slides to the Table of Contents
Once your e-book has been written link your slides to the Table of Contents. The way to do this is:
a) Highlight the line of text in the Table of Contents you want to hyperlink
b) Go to Insert/Hyperlink
c) Select ‘Place in this document’
d) Chose the slide heading from the selection that appears
e) Click on OK

You’ll notice that all the hyperlinked lines of the eBook are now automatically underlined showing that they are active.


Wednesday, January 30, 2019

Using PowerPoint creatively to teach an activity on adjectives and descriptive writing to a Grade 3 class


image
Mrs Truett's Third Grade
Earlier this term, whilst researching on the Internet, I cam across two posts on adjectives that fascinated me. The first was a post in a Grade 3 blog (Mrs Truter's Third Grade) showing two photos of an activity on Adjectives https://bit.ly/2NfO6EZ (see the photo on the right). The second post was a video on the use of adjectives in descriptive writing found at hhttps://bit.ly/3qN0hXo This gave me the idea of doing something similar to both of these posts with a Grade 3 class and including technology (see photos below).  The students enjoyed the activity so much that I decided to write a blog post about it.

Lesson idea
The Grade 3 students find at least 20 positive adjectives relating to themselves. They present these creatively using PowerPoint where the skills of font choice, font size and colour are emphasised, They discover how adjectives used in writing make writing come alive and write a descriptive paragraph about themselves using as many of the adjectives as they can.   

Step 1: Create a template for the students to use
I figured this could be created on two A4-size pieces of paper joined together with a piece cut out for the head. I created the template idea for the students to copy in PowerPoint.

Slide1Slide2
Download the adjectives template as a PDF

Step 2: Explore adjectives with the class and how they can be used in descriptive writing
The next step was to talk about the importance of adjectives in writing.  We revised the meaning of adjectives. I read the class a very plain paragraph that had no descriptive words and asked them to draw a quick picture using a drawing programme they were familiar with (in this case Paint). All the pictures were different. Then I read the same paragraph but this time with lovely descriptive adjectives and asked them to draw the picture. This time the pictures were very similar because the adjectives had led a much clearer image being imagined.

Step 3: Brainstorm positive adjectives that can be used to describe other students in the class.  
We now had a brainstorming session on adjectives that could describe others in the class. The instruction was that the class should use only positive words but that no names should be mentioned.  As the students called out words I typed them out and displayed them on the screen via the data projector. These were left on the screen as prompts for words during the remainder of the activity. 


adjectives3


Step 4: The students think of 20 adjectives to describe themselves and fill them in on the provided template
Since the school I volunteer at uses Windows computers we used PowerPoint for this lesson. However Keynote on an iPad or a Google Presentation on an Android tablet would have done the trick as well. 

Step 5: The templates are completed and printed
As far as technology skills are concerned this was a good way of working creatively with font types, font size, colour and font position. As far as using adjectives is concerned the students enjoyed thinking of positive words about themselves. 

Step 6: Print the templates, cut out the head space, glue the two pages together and draw hair using regular crayons
Here is a photo of some of the final results of this activity. 

three boys


Step 7: Create a description of oneself using the selected adjectives
In the next lesson this part of the lesson would be tackled. The students will use the adjectives to write a descriptive piece about themselves. 

Saturday, February 10, 2018

I love about OneNote and here are some reasons why...

This is a cross post of a post that I wrote for the SchoolNet blog earlier in January. OneNote is one of my favourite programs.

Teachers, have you tried using OneNote? Once you do you'll be hooked! OneNote is a digital tool from Microsoft that allows you to type, write or draw your notes and store them in an organised fashion in a digital notebook. You can access your content from anywhere on any device. I am a keen OneNote user and this year I plan to explore all the possible features of using OneNote in teaching. In this post I will discuss some of the the benefits of OneNote to teachers. Really, it is a must!


Which version to use
My school doesn’t subscribe to Office 365 but we do have a licence to use Microsoft products at school. We have Windows 10 desktops so OneNote is available to use. The OneNote 2016 version of OneNote on the desktop has so many incredible options to use. At school I let the learners use OneNote online and I use that too for demonstration purposes. It doesn’t have as many features as OneNote 2016 on the desktop, but it syncs with my home version of OneNote 2016 which is great! In the features that could help teachers, mentioned below, I’ll note which version of Onenote this refers to if it is only found in one of the two versions I am referring to.


1. Make a TO DO list for the day
If you go to Home >To Do tag you can easily create a TO DO list. This can be created on a separate page or it can be added to any page of notes. 


2. Use page colours and lines if desired (OneNote 2016)
You can choose different page colours (Go to View > Page colours) and you can also add a variety of line templates in OneNote 2016. (Go to View > Rule lines). Since you can write anywhere on a OneNote page the your typing fits beautifully into the lines.
3. Insert documents or add saved files into your notebook
You’ll see that you have a place for SECTIONS and PAGES in your OneNote Notebook so that your OneNote Notebook is always clearly laid out. In OneNote online these pages are stored in OneDrive. In addition to taking notes on the page you can also insert documents such as PDFs, Word documents, PowerPoint slides etc.

a) Insert documents
If you just wish to add a downloadable version of a document stored on your computer you can easily do so. Click on Insert > File Attachment

Add the document of your choice from its saved location. It will be added to your OneNote as shown. 


b) Add notes in the form of print outs
In a Word document use the PRINT icon and then select SEND TO ONENOTE. You’ll notice a message comes up in OneNote asking where you would like to add this. In OneNote 2016 these open when you click on them. In OneNote online you have to download the document and then open it. 


Select where you would like to add the notes. Below is an example of a Word document that I have added. I cannot make any changes to the wording but I can write on the page. 


4. Use inking (OneNote 2016)
Inking (drawing) is a great feature to use. You'll find this feature under Draw in the menu bar.  Any touchscreen device or a computer with a mouse can take advantage of OneNote’s inking feature. Hand write notes, draw diagrams, or annotate notes and images with the freehand drawing tools. You can also annotate on a page of existing notes.


5. Easily capture your web research (OneNote 2016)
I love this feature in OneNote. I have created a SECTION called RESEARCH in on of my notebooks and as I surf the net and find interesting articles I would like to keep I send information to OneNote. This could be a whole page or part of a page sent directly to OneNote. Click Ctrl +P on your keyboard (or choose File > Print), select Send to OneNote 2016 from your list of printers, and your page is sent to wherever you wish to file it.


6. Clip from the web with the OneNote Clipper (OneNote online)
Since I often use the Chrome browser, I have installed the OneNote Clipper extension
The OneNote Clipper can be used to save any page directly to OneNote without the clutter. All of your clips are saved to the Quick Notes section of your default notebook. You’ll need to install OneNote Clipper and sign in.


 Once you have clipped something it appears in your OneNote. Here is an example:


7. Use Templates (OneNote 2016)
OneNote has a a selection of templates which can help teachers (and students) create better class notes. Go to Insert > Page Templates.

You can also create your own templates as follows:
  • Design your template on a blank page. Select the Insert tab.
  • Click the Page Templates button. The Templates pane appears on the right side. 
  • Select Save Current Page as Template on the Templates pane. Name the template in the dialog box.
  • Click Save. A new category called My Templates holds all your templates.

8. Use Voice Notes to capture thoughts about learners’ work 
(OneNote 2016)
OneNote’s recording facility is a great advantage. You can combine it with text on the page. To start recording on the web, click Insert > Record Audio. Once you’re finished recording, click Stop. You can play the file by selecting it and then clicking the Play icon that appears.


9. Use video with OneNote (OneNote 2016)
Click a location on the page in OneNote where you want to place the recording. Click Insert > Record Video.


Recording starts as soon as OneNote adds a media icon to the page. When you want to stop the recording you press Pause or Stop on the Video tab. To play the recording, click the media icon on the page and then click Play.


10. Prepare lessons and keep organised

a) Create lesson plans on OneNote
This video shows how to use OneNote to record lesson plans using the LEARN format, including how to insert a table, hyperlink to a document, and insert a screen clipping.


b) Use OneNote as a Classroom planner
OneNote Planners can be individualised, adding a page (or starting a new workbook) for items such as a term calendar, your weekly work program, student comments, assessment schedule, curriculum documents or meeting notes. Take a look at this video:


https://www.youtube.com/watch?v=nYabXTj4zGc

c) Use OneNote as a Digital daybook
The following video shows you how to create a teacher's daily diary of lessons and notes using OneNote.


https://www.youtube.com/watch?v=Q6KW8MWgSfI

OneNote is a must for all teachers who want to go paperless with many aspects of their teaching.  Give it a try. Visit http://www.onenote.com/ and download OneNote today!

Friday, June 12, 2015

I have enjoyed using Microsoft Sway with my classes at school


Sway is a free,  online, presentation web app - part of the Microsoft Office family of products I have been using with Grades 6,7 and 8 at my school. . It is also available as a iOS app. All you have to do to get started is go to this URL https://sway.com/ and join up by creating a Microsoft ID. Then just explore! What I love about Sway is that it allows one to combine text and media to create an online presentation with a difference! You can pull content locally from your device, or from Internet sources such as Bing, OneDrive, YouTube, Facebook etc. One can add videos, text, images, sound…you name it. Before you know it you have a lovely presentation!

Here are some of the ways I have used it in class

1. An assignment
I set the Grade 7s and 8s an assignment on social networking using Microsoft Sway. The aim was two- fold – for them to experience using Microsoft Sway, and for them to investigate the dangers and advantages of social networking. I presented them with the assignment using a Sway as a demonstration so that they could see it in action.

Here are some of their Sways:
Why teenagers like Facebook


2) Digital storytelling
With the Grade 6s we used Sway for digital storytelling. The class had previously written fractured fairy tales using Microsoft PowerPoint and illustrated them with a programme called Storymaker2. We added the finished products to Sway to display the stories. Here are some of the Sways:
With the Grade 6s we've started to collect the poetry we've written this year and display it in Sway as a portfolio of our poetry.

Here is an example.

A video tutorial to get your started
This short Microsoft video tutorial is presented by Koen Timmers.


This application, Sway, is fun for students! They latch on to how to use it very quickly. The possibilities are endless… Why not try it?

Webinar recording from SchoolNet’s free webinar on Thursday 11th June at 3:15pm ‘Microsoft Sway – what it is, how to use it in the classroom, and how to create one’ by Fiona Beal

On Thursday afternoon 11th June we held a SchoolNet webinar entitled, ‘Microsoft Sway – what it is, how to use it in the classroom, and how to create one’. I was the presenter and the host!

image
Background to the webinar
Sway is a new, free presentation web app - part of the Microsoft Office family of products. It creates lovely eye-catching, attractive, online presentations. It is also available as a iOS app. All you have to do to get started is go to this URL https://sway.com/ and join up by creating a Microsoft ID. Then just explore! Sway allows one to combine text and media to create an online presentation with a difference! You can pull content locally from your device, or from Internet sources such as Bing, OneDrive, YouTube, Facebook etc. One can add videos, text, images, sound…you name it. Before you know it you have a stunning presentation!

The webinar description
Fiona says, “You'll love Sway - it's a free, online presentation tool that can be used in many different, interesting ways. In this webinar we'll discover what Microsoft Sway is all about and we'll go through the process of creating one. We'll also discover the many ways of using Sway in your classroom. Please join us on the webinar.“

The downloadable webinar presentation
Here is the downloadable presentation from the webinar available online in SlideShare:


The webinar recording
The webinar recording can be listened to on the following link: http://meet78641452.adobeconnect.com/p342htcs13j/

SchoolNet South Africa provides a short, free webinar on most Thursday afternoons during the school term.

Monday, June 1, 2015

I’m swaying with delight after using Microsoft Sway in class!


I am writing about a new Microsoft product called Microsoft Sway that I have been using with Grades 6,7 and 8 at my school. Sway is a free presentation web app - part of the Microsoft Office family of products. It is also available as a iOS app. All you have to do to get started is go to thisURL https://sway.com/ and join up by creating a Microsoft ID. Then just explore! What I love about Sway is that it allows one to combine text and media to create an online presentation with a difference! You can pull content locally from your device, or from Internet sources such as Bing, OneDrive, YouTube, Facebook etc. One can add videos, text, images, sound…you name it. Before you know it you have a lovely presentation!

How have I been using it?

1) A social networking assignment

I set the Grade 7s and 8s an assignment on social networking using Microsoft Sway. The aim was two- fold – for them to experience using Microsoft Sway, and for them to investigate the dangers and advantages of social networking. I presented them with the assignment using a Sway as a demonstration so that they could see it in action. 


Here are some of their Sways:
Why teenagers like Facebook


2) Digital storytelling
With the Grade 6s we used Sway for digital storytelling. The class had previously written fractured fairy tales using Microsoft PowerPoint and illustrated them with a programme called Storymaker2. We added the finished products to Sway to display the stories.

Here are some of the Sways.
With the Grade 6s we've started to collect the poetry we've written this year and display it in Sway as a portfolio of our poetry.

Here is an example. 
My Writing portfolio


This application is fun for students! They latch on to how to use it very quickly. The possibilities are endless with Sway. Why not try it? 

Friday, April 3, 2015

A report back on The Microsoft Classroom Roadshow in Cape Town...

This is a cross-post of a post I wrote for the SchoolNet blog about the Microsoft Roadshow in Cape Town, and which I attended this past week. 

Microsoft has been running a series of Microsoft Classroom Showcase Roadshows in four venues around the country. School leaders and educators were invited to participate in an afternoon showcase experience to demonstrate how Windows 8 Tablets, Office 365, Microsoft Professional Development and other education tools and resources can help to transform learning. The right technology in the hands of educators with access to the best solutions and pedagogical training will create a force that truly transforms education across South Africa and Microsoft was keen to demonstrate their offerings.   The hashtag used for this groups of Roadshows is #MDEdutour

IMG_3212

IMG-20150331-WA0001
These are some of my takeaways from the Microsoft Roadshow held in Cape Town on Tuesday 31st March from 12:30 – 5pm.

1. The Office 365 tour presented by Jaye Richards-Hill
Jaye Richards-Hill from the Tablet Academy is an Office 365 expert and after Angela Shaerer had opened the event Jaye took to the podium with an amazing tour of Office 365.  She started off by enlightening us on the changing education landscape and reverted to her own educational experiences as a Science teacher whilst in Glasgow.

One Drive
Jaye started with a demonstration of One Drive which is a free Microsoft site in the cloud that hosts Microsoft Office online plus 15GB of storage space. For Office 365 users One Drive offers unlimited storage. Providing schools with connectivity is the first priority so that teachers can use the cloud for storage.  

IMG_3217
As a teacher, whether you are using Office 365 or whether you are not, One Drive is a great place to create, store and share all your documents, assessments, planning etc. One Drive is the free part of Microsoft online. One Drive also allows collaboration via the sharing of documents. She likened One Drive as a digital filing cabinet.

Yammer
This is a social network that is built into Office 365.  It is like using Facebook in the class.

Image result for yammer

Yammer integrates like a social network down the side of the document which is built into Office online. Yammer offers praise cards, comments, groups etc. One can create a closed group e.g. Class Natural Cciences group. Yammer is an internal network, but a teacher can create a network with external people such as parents and caregivers. Yammer could be a way of strengthening home and school collaboration.

IMG_3218

Sites
Sites is an online space where students can personalize their site For example: Grade 10 Art site shown above. It is a place to give assignments, share documents etc. Sites is like a blog, a place for sharing creative writing or other files of collaborative work. One can also integrate external Apps into Sites. 

IMG_3219 IMG_3220
All these tools and service work together.  Other tools and apps work through Office 365.  MSN apps in Windows 8 are good. Free content is available.

OneNote Class Notebook
This is the Microsoft product most like Google Classroom.  Work with students in lots of different ways. This can be set up in Office 365 and also in One Drive. Go to One Drive, select Apps and add OneNote online. To set it up is a four step process…very simple. You can assign students and teachers. It is a collaborative site where you can add sound clips, movies etc as well as documents. Storage space is limited so it is best to add links to media on external sites.

IMG_3222


One can summarise lecture notes using OneNote for better recall and understanding. One can also use OneNote offline and synchronise when online again.

Office Mix
You can turn PowerPoint into a great tool for reading and teaching by adding the Office 2013 Office Mix add in for extra functionality. It includes polls and quizzes and is great for flipped classroom use.  It also has whiteboard functionality. You can embed a video of yourself explaining what is being shown. You can also add a screen recording, a sound byte, a quiz or a poll as mentioned or a free response questionnaire

IMG_3223 IMG_3224
Once created you can upload to the Office Mix Gallery and share with others. There is a is a growing repository of resources on the gallery.

IMG_3227


Best is you can also get starts of how many have watched each slide and how long they spent on it.  Analytics and data for each slide assist in adapting the presentations to suit the grade.

IMG_3225 IMG_3226
Office Sway
Sway is similar to Slide Rocket or Prezi and is another creative way to present your information. You can add images, text, videos, documents, colours etc to make the Sway. You can even add channels to make the presentation. PowerPoint can be changed into sways.  Jaye gave a quick demonstration on how to make a Sway.  She also went through the SAMR model of technology integration (SAMR - teachers adopting technology....augmentation, modification redefinition)  which she presented on a Sway.
IMG_3229 IMG_3231
This was a clear and excellent presentation all round. Jaye gave many examples of how these tools were being used effectively in the classroom – I thoroughly enjoyed listening to this.

2. Presentations by #MIEExpert15 educators
At the roadshow we had some great presentations from our local Microsoft Innovative Educator Experts (#MIEE15) for 2015.

a) Karen Stadler’s Save our Rhino project
Karen really wowed us with her presentation about this very successful world-acclaimed project which she calls the ‘project of her heart’. Her project wiki can be found at http://saveourrhinos.wikispaces.com/. Large numbers of schools in every continent are participating in this project.  This project has clearly developed a life of its own as it brings awareness of the disastrous poaching of rhinos for their horns.

IMG_1897


b) Linda Foulkes shared on One Note and other Microsoft products
Linda is an expert when it comes to using Microsoft tools effectively. She shared so many nuggets on using One Note in the classroom. She feels that OneNote is an underrated collaborative app. She encouraged all teachers to explore the Microsoft Educator Network. Linda will be facilitating a MicrosoftMeet at Bishops on Saturday 16th May 2015 from 10:00 – 12:00 am.

IMG_1898 IMG_1900

A MicrosoftMeet (like a TeachMeet) is to be held at Bishops on 16th May from 10:00 – 12:00 am

3. The last two presentations of the day were from Microsoft Partners
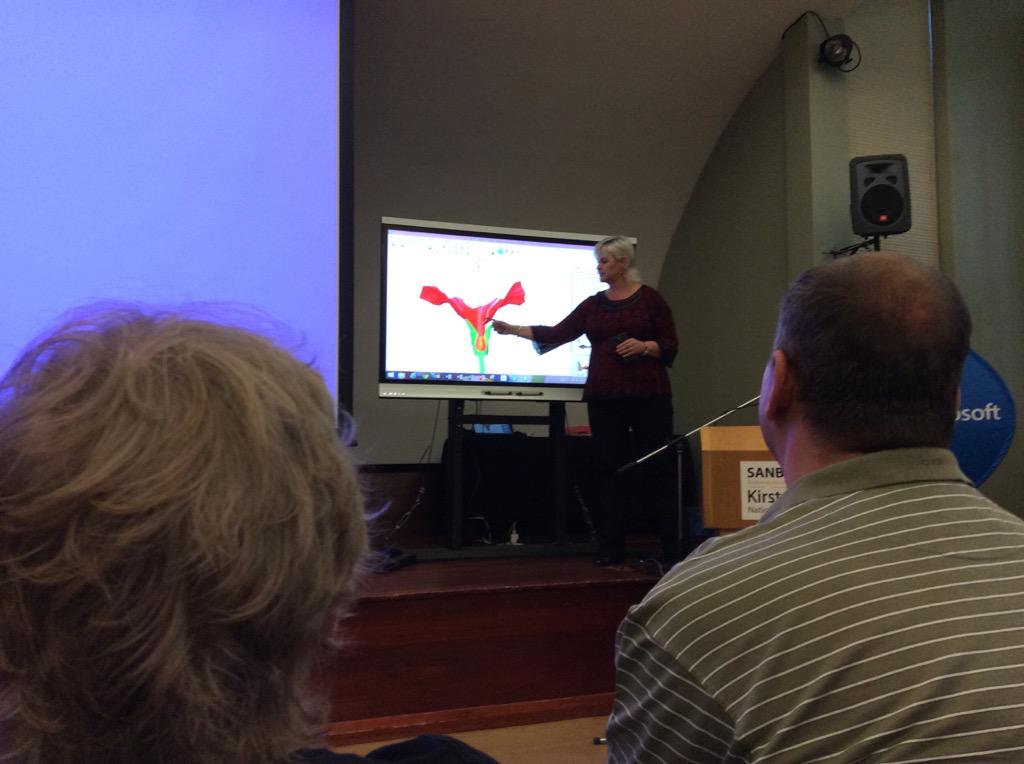
a) Karen Durand from Smartboards gave an inspiring demonstration of how a teacher and a class can benefit from using a Smartboard in the classroom
View image on Twitter

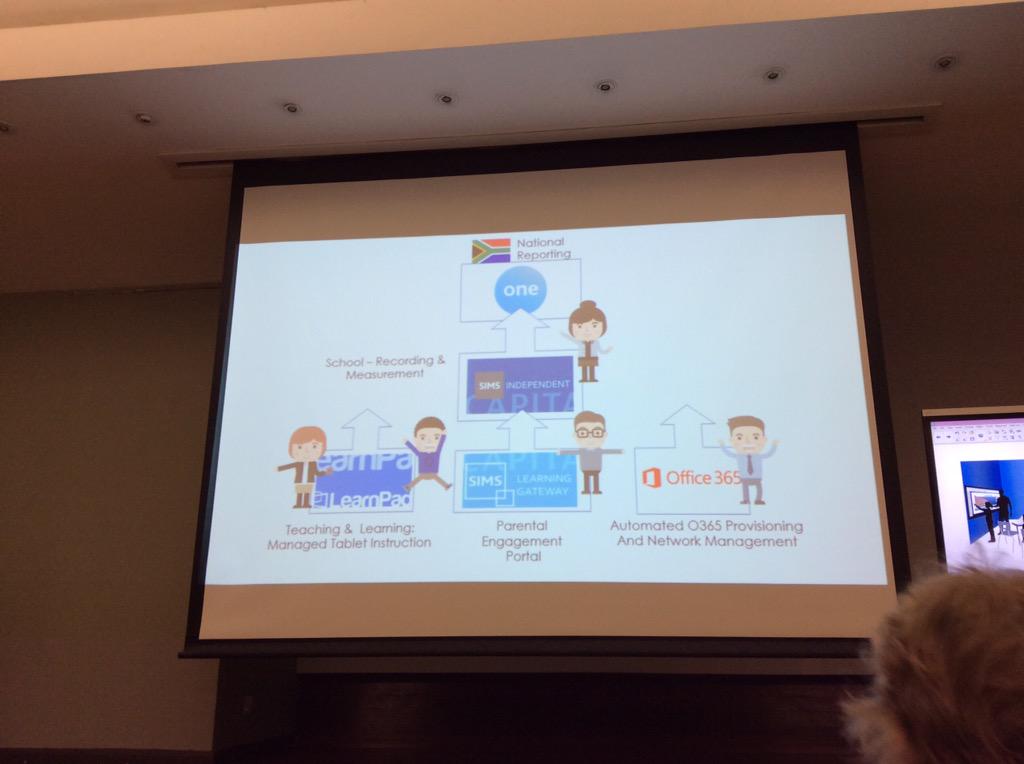
b) Brad from EDU365 informed us about the company’s many offerings for teachers.
View image on Twitter

This was definitely a most informative afternoon – an afternoon well spent.  Thank you to Microsoft for bringing this Classroom Roadshow to Cape Town.

A collection of the tweets on Storify
A collection of tweets from the afternoon can be found on this link: http://bit.ly/1DUkY8w