Google Slides is a great for creating e-books. We created them as part of a Natural Disasters project in Grade 7. Each students chose a different project. I outlined the instructions in Google Classroom.
This is what we did:
First we created the template for the e-book as shown below. https://goo.gl/kKJss7
The task
I provided the task in a Google Doc and we discussed it at length https://goo.gl/UwyyFu . We also revised how to research and how to provide links to the material used.
Examples
The students did these really well. Here are a few examples:

Sunday, August 28, 2016
Saturday, August 27, 2016
Hyperdoc poetry lesson: If I were in charge of the world
I came across this lovely lesson idea on Laura Chandler's wonderful poetry page: http://www.lauracandler.com/filecabinet/literacy/poetry.php : At the bottom of the page she has a section called:
Poetry Multimedia Project - If I Were In Charge of the World
"Idea submitted by Radene Girola
Last year one of my newsletter subscribers described a wonderful multimedia project she does with her students. She uses PhotoStory 3 which can be downloaded for free from Microsoft, but other multimedia programs would work as well. Radene has her students take the poem "If I Were in Charge of the World" by Judith Viorst and asks them to rewrite it in their own words and create a PhotoStory. She sent me a sample PhotoStory she created for her students, and I have her permission to post it online. Please be aware that this file requires Windows Media Player, and if you have a Mac you might not be able to view the file. (Download the free VLC player fromhttp://vlc.us.com and that should allow you to view it.) She also sent me her lesson overview. I have omitted the original poem by Judith Viorst due to copyright concerns, but you can order the book from Amazon.com or look for it in your library. Take a look at Radene's sample PhotoStory and prepare to be inspired! This would make a great end-of-the-year project! If you have questions about this activity, feel free to contact Radene at radene.girola@comcast.net."
I felt this would make a perfect lesson for my Grade 6 class and I decided to create a Hyperdoc lesson.
The original Hyperdoc:


Poetry Multimedia Project - If I Were In Charge of the World
"Idea submitted by Radene Girola
Last year one of my newsletter subscribers described a wonderful multimedia project she does with her students. She uses PhotoStory 3 which can be downloaded for free from Microsoft, but other multimedia programs would work as well. Radene has her students take the poem "If I Were in Charge of the World" by Judith Viorst and asks them to rewrite it in their own words and create a PhotoStory. She sent me a sample PhotoStory she created for her students, and I have her permission to post it online. Please be aware that this file requires Windows Media Player, and if you have a Mac you might not be able to view the file. (Download the free VLC player fromhttp://vlc.us.com and that should allow you to view it.) She also sent me her lesson overview. I have omitted the original poem by Judith Viorst due to copyright concerns, but you can order the book from Amazon.com or look for it in your library. Take a look at Radene's sample PhotoStory and prepare to be inspired! This would make a great end-of-the-year project! If you have questions about this activity, feel free to contact Radene at radene.girola@comcast.net."
I felt this would make a perfect lesson for my Grade 6 class and I decided to create a Hyperdoc lesson.
Reusing an already created Hyperdoc
I found a suitable Hyperdoc that someone had already created called "If I were President" which I copied into my own Google Drive. https://goo.gl/I87EyJ . I then changed it: https://goo.gl/zCj4QP
The original Hyperdoc:

My changed Hyperdoc:

Examples
I was really thrilled with the poems my students created. They used images and their own voice with created music.
Example 1:
Example 2:
Thursday, August 18, 2016
Do you know this free Google App for making downloadable collages - Fotojet?

Today I wanted to make some online collages in order to save space with photos in a blog post I was writing. I noticed that on the Google Chrome Web Store there is an app called Fotojet, so I added it to my Google Chrome Apps and tried it out. I really like it. Fotojet is a free online collage maker, graphic designer and photo editor. It claims that it can turn your photos into a work of art! You can also find Fotojet online at https://www.fotojet.com/app.html .
Here’s how I used it once I had opened the app online.
1. Click on Make a Collage

2. Select Classic Collage
When the collage page opens there is quite a choice, I was pleased to see. However, I decided to select Classic Collage to suit my purposes.
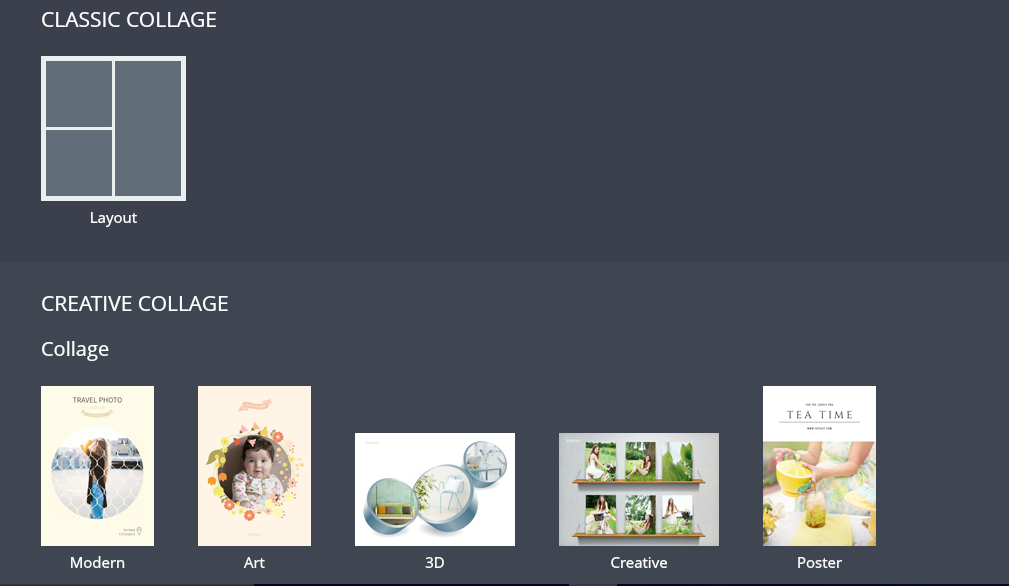
3. Choose your template
There was a great choice of classic template designs.

4. Select your template option and add your photos to Fotojet.com
When you add the photos you have the option of choosing from Facebook or choosing from your computer. The photos I need I saved on my computer so I took that option.

5. Save, share or print your collage
Above the collage you create are the options to Save, Share or Print your selection. I selected Save and it immediately gave me a number of options for the Name, Quality and Size of the photo.
Above the collage you create are the options to Save, Share or Print your selection. I selected Save and it immediately gave me a number of options for the Name, Quality and Size of the photo.

6. Do you want to share your image on social media?
You also get the option to share your image on social media should you wish to.
You also get the option to share your image on social media should you wish to.

This is a great app for making colleges. I really recommend it. I can't wait to try out all the different options it offers.
Sunday, August 14, 2016
A great way to easily download videos from YouTube...
In South Africa the Internet can be a real problem in the classroom at times. You want to show a Youtube video clip to your classes as an introduction to a lesson, but when you click on it the video buffers and buffers! Ever experienced that? So the best thing to do in my opinion is to download the video. That poses the question: ‘How do you download a video from YouTube quickly and easily?’ There are several ways one can do this. One way is to use savefrom.net.
This is what I discovered when trying to download a YouTube video using Windows 10.
1. Remove the http://www. details from the YouTube URL
Find the video that you want to download. Replace the initial part of the YouTube URL, http://www. (including the full stop) with ss (For example: https://www.youtube.com/watch?v=A1AqXLCsC1c becomes: ssyoutube.com/watch?v=A1AqXLCsC1c).

2. Download the video
This will take you to a page on savefrom.net http://goo.gl/f3x3c4 .. You’ll be asked if you would like to install the program (I did). By the way beware of other enticing video downloaders advertised on that page. Just stick to the green download button next to the image of your video.

3. Check the video on your deviceIt works!

4. The download button appears under online videosBest is that the green download button now appears under all YouTube videos AND on Vimeo videos I have discovered! From this point onwards you don't have to do the 'ss' thing or anything else. All you have to do is press the green download button and the video downloads. Awesome right?

Try this process especially if you are a teacher.
Tuesday, August 9, 2016
Google Slides: Make a cheat sheet
When I came across @cogswell_ben's superb Google Cheat Sheets I realised that these are a great example of a different way of using Google Slides. Ben has kindly given these a Creative Commons license so that they can be reused. One can't embed them but if you click on the images below you'll be taken to the originals. However, this is such a useful way of providing tutorials to students.


CLICK ON THE IMAGES
This concept is so useful for creating documents for students to use in the classroom. It is definitely worth pursuing the topic of Hyperdocs! Visit Ben's blog https://goo.gl/OqQh1M
Thursday, August 4, 2016
Google Slides: Publish a Google Slides story in different ways on the Internet
Google Slides is great for writing stories. One can use half a slide for the story and the other half for the illustration. My Grade 5 class took part in a writing project with two schools in other countries - one in the USA and one in Argentine. We wrote collaborative stories, with my class working in groups of three and starting the story. We were also responsible for the final editing and the illustrations. We used a purchased program that is no longer available to do the illustrations.
It can also be presented online as a Google slideshow as illustrated below. However, the great thing about writing a story in Google Slides is that it can be downloaded as PDF and then uploaded to a variety of free online sites such as Slideboom, Slideshare and Youblisher among others. The example below shows the story in Google Slides as a presentation and then in Youblisher as an e-book.
a) As a Google online slideshow
b) In Youblisher.com as an e-book
Click on the image below to be taken to Youblisher.com http://goo.gl/QPd6Nn
Monday, August 1, 2016
Google Slides: How to make a brochure using Google Slides
Google Slides is a great tool to use for making a six-sided brochure. I decided to try it out with my Grade 5 class. They were learning about the heritage sites in South Africa in Social Sciences.
The task
Create a six-sided brochure showing two important heritage sites in South Africa that you would like to visit.
This is how I went about it
Google Slides work really well for making a brochure. Until I have some completed work to show I'll use this image from https://goo.gl/kJtAVr.

The task
Create a six-sided brochure showing two important heritage sites in South Africa that you would like to visit.
This is how I went about it
- I created a template and uploaded this to a shared folder in Google Drive. All I did was divide two slides into three and added a guide for the answers. These division lines can be removed when printing. (The presentation below shows the template)
- I put the link to this shared folder into Google Classroom so to ensure an easier workflow. The students had to make their own copies which would automatically go to the shared folder as first option.
- I also added the link to a Google Document I had created with some brief information as a guide for the class https://goo.gl/TZqDU4 .
Google Slides work really well for making a brochure. Until I have some completed work to show I'll use this image from https://goo.gl/kJtAVr.

Subscribe to:
Posts (Atom)